Tolero Criterium Series #1

Tuesday, April 8, 2014


You know that feeling when you've just uploaded your ride to Strava and are hovering over that "Private" button with the thought that you should not show anyone how bad you did in a race?

No, of course not. Me either, I was just speaking hypothetically.

Last year's race (dark), this year's (light)

I raced in two of the Tolero crits (the 5's and the 4/5's). The fields were small, I think seven guys in the 5's and nine in the 4/5's. My goals (in order of importance) were to not crash, work on cornering confidence, work on pack riding confidence, see how my sprint/jump was, and finish with the groups.

I am happy to report that I met almost all my goals. But I still hovered over that “private” button for a while...

The 5’s


I didn’t have a great warm-up but the first three laps were slow so it wasn’t a big deal. The forth lap was a prime and so we all upped the pace and I felt good. I decided not to go for the prime and wait for the next one with the intent of seeing how good my jump/sprint was.

The second prime came on the seventh lap. I stayed in fifth position with the intent of seeing how many guys I could pass on the sprint hill. I jumped hard out of the corner and pushed hard for what ended up being a 10-second burst. I was geared right with a good steady cadence. Surely I could pass at least one guy, right? Wrong.

And don’t call me Surely.

I had no jump, no acceleration, and no speed. I felt fresh and had zero fatigue in my legs but I just had no strength. Post-race data showed that my peak power was less than my 10-second power at last year’s Tolero crit. Ugh. I continued in the race with the sole intent of working on my cornering. I took corners at varying angles and found the good lines for staying off the brakes. I played around with tailgunning* to avoid the slowing of the other riders and was able to carry my speed through the corners and re-attach to the group with minimal effort.

* Tailgunning is when you are at the back of the group and allow a little gap between you and the rider in front of you. When you go through a corner, usually the group will slow and if you are right on the wheel of the rider in front of you braking is required (which wastes energy). By tailgunning, you can stay off the brakes and take the corner at your own speed, hopefully timing it right so that you regain contact with the group without needing to accelerate.

I felt good in the corners and loved the feel of the Noah, which is much stiffer than the Allez. The shorter wheelbase and more aggressive saddle-to-bar drop (giving me a lower center of gravity) really gave me a feeling of complete control in the turns. I’ve still got a ways to go with the cornering confidence, but I made some significant gains during these races.

I didn’t sprint for any of the other primes and instead waited for the finish. I didn’t have much hope based on my earlier “jump” and that negative mindset probably did more damage than my lack of strength. I was “lazy” on the last lap and didn’t try to move up into a good position. When we went into the final corner I was in last position, and despite all the power I could muster, that’s where I stayed.

Last.

The 4/5’s


With the discouraging results in the 5’s race I didn’t have much hope for the 4/5’s. The plan was to work on cornering some more and stay with the group. I didn’t plan on going after any of the primes and doubted that I had enough jump to follow any attacks. I had a better warm-up for this race which was good because it was fairly quick from the start.

The first prime came on the forth lap and the pace quickened in preparation for the sprint. I was near the back and unfortunately the guy in front of me let a gap develop during that lap. When it came time to close it he was able to power his way back into the group but I couldn’t hold his wheel and spent a lot of energy getting back in the group. I tried to recover but the pace was high and the accelerations out of the corners were taking their toll. After just 10 minutes I popped and watched the group slowly move away from me. Ugh.

I decided to stay above threshold and continue to work on my cornering. It sucks riding solo but after two laps I had caught another guy who had been dropped. I pulled around and told him we should work together to try to catch back on. We traded pulls for a while but I guess he was pretty toasted because any gains I made during my pull were lost when he pulled. After probably six laps I finished a pull and expected him to come around me but he was gone. I looked back and was shocked that I couldn’t see him at all. Apparently he crashed on the tight "dumpster corner" but I never heard it so I think he may have lost my wheel at some point prior to the crash. Hopefully he’s not banged up too bad.


The Dumpster Corner

I tried a few different lines through the dumpster corner. The green circle above represents the maximum-radius route, which in theory is the fastest line through the corner. When going through as a group you're limited on what line you can take, but when you're on the front or solo following this radius is likely the best option. I can recall riding over the concrete pad a couple times which is a very inefficient route.

I got back to work solo, working on cornering and staying above threshold. I started feeling very confident on the dumpster corner as well as the final corner before the sprint hill. At about the 5-laps to-go mark, I was lapped by a three-man break containing my good friend, Cody. I was bummed to get lapped but super excited for him. I looked back and couldn’t see the main group yet so I decided to work as hard as I could to stay away from them. Half a lap later and I had another dropped rider in my sight. I caught up to him and told him we should work together to stay away from the main group. We traded 1-lap pulls for the remainder of the race and on the last lap I asked him if he wanted to sprint it out. The only reason I wanted to sprint was for the practice, but he wasn’t interested. I did a half-hearted sprint to the line only semi-curious about the top number I could generate. It wasn’t much.

Second to last.

Not exactly my idea of a good race day. But all things considered, I’m happy. I really enjoy crits and cornering well is a major factor in these races. Having the opportunity to work on that was definitely beneficial. I’m not surprised by my lack of jump. Since getting back on the bike I’ve been focused on restoring my aerobic endurance -- not anaerobic. I’ll be moving out of my Base period and into my first Build period of the year soon and I fully expect to regain the jump I once had (and hopefully surpass it).

Building a Solid Base

Friday, March 21, 2014

Khafre Pyramid near Cairo, Egypt

You've likely heard it discussed before: it's time to build up a good "base" for the coming season. So what is this base? Why do you need it? When do you start it? How do you get it and how do you know when you have it? I won't pretend to be an expert on training, but I'll offer what I've gleaned from others as well as my own personal experiences with the Base period.

What is Base?


"Periodization" is widely accepted and utilized for training. Periodization is simply breaking down a training year into different periods: usually Base, Build, Transition, Taper, and Peak. The Base period is the first "step" in a training year and is meant to be the aerobic fitness foundation for the rest of the training (and therefore is considered to be the most important component of training). Without a good base, one will likely not reach their full potential and may even experience injury when training at higher intensities later in the year.

When Should I Work on My Base?


Since the Base period is meant to be the beginning of a training year, when it starts depends on what you are training for. If you are training for the Colossal Cave road race in April your Base period will start earlier than if you are training for El Tour de Tucson at the end of November. If you aren't training for a specific event, your Base period will want to coincide with what you would consider your "off-season" (perhaps the winter months when you might ride indoors more often). The Base period requires the most time on the bike compared to the other periods, so ideally you would build your base over the time of year when you are able to devote the most time to training.

What Workouts Should I Do?


According to many training guides, the Base period is mainly about increasing Aerobic Endurance (AE). Simply put, AE workouts are riding for extended periods of time in heart rate zone 2. The minimum ride length is probably 30 minutes, and the maximum depends on the individual. For the first four weeks of Base (Base 1), you'll mostly be doing AE rides -- but it is a good idea to include some Speed workouts too. For weeks 5 through 12 (Base 2 and 3), adding some Force and Muscular Endurance (ME) workouts is recommended. The following general time percent breakdown can be used as a template:

AE
Speed
Force
ME
Base 1 (weeks 1-4)
90%
10%
--
--
Base 2 (weeks 5-8)
70%
15%
10%
5%
Base 3 (weeks 9-12)
55%
15%
20%
10%

Everyone's heart rate zones are different, so you will need to determine your own zone 2. There are a few ways of doing this. My recommendation is to perform a 30 minute LTHR (lactate threshold heart rate) test. This test is difficult but well worth the time and effort. If you have a power meter the same 30 minute test will give you your LTHR and FTP (functional threshold power). Click here to learn how to perform the 30 minute test.

Once you know your LTHR, you can determine your heart rate zones. They are as follows:

Zone Percent of LTHR
1 (Active recovery) < 80
2 (Aerobic threshold) 81 - 89
3 (Tempo) 90 - 93
4 (Lactate threshold) 94 - 99
5a (Super-threshold) 100 - 102
5b (Aerobic capacity) 103 - 106
5c (Anaerobic capacity) > 106

For example, if you find that your LTHR is 175 bpm, your zone 2 range would be 142 - 155 bpm. Aerobic endurance training will mainly utilize your slow-twitch muscle fibers. These muscle fibers produce most of the power in cycling, with the fast-twitch fibers only utilized during the very high intensity efforts associated with attacking and sprinting. Training in higher zones will be less effective at strengthening your slow-twitch fibers, so during Base training, the more time you can remain in zone 2 the better. With aerobic endurance training, fat is the primary fuel used for exercise (not carbohydrates). Make sure that you fuel your body appropriately.

If you are fairly new to training, the amount of time you should spend riding in zone 2 during the Base period depends on just one thing: how much time you have available. It doesn't matter if you are training for 100-mile road races or 30-minute crits -- the more aerobic endurance miles you can rack up during the Base period, the better. Realize, though, that it is possible to overtrain even when riding at this low intensity. Pay attention to your body and take recovery days to avoid building up too much fatigue. If you have a power meter you can monitor this with your Performance Management Chart (to be discussed in a future blog post).

How Long Should Base Last?


There are a few methods to determining how long your Base period should last. Some training programs simply set it at 8 or 12 weeks. Some individuals I've talked to simply go by weight loss (they have a set racing weight that they shoot for). The methods I'll describe here are not meant to be the rules for ending your Base period -- I provide it because I believe the more information you have about your fitness the better you'll train. So if you want to stick to the 8-week program that is great -- you can still monitor the other techniques described here.

Efficiency Factor


Efficiency Factor (EF) is defined as the average power you produce divided by your average heart rate over the time you spend in zone 2. EF does not apply to time spent outside zone 2, so it is important to maintain a somewhat steady heart rate within your appropriate range. Typical rides require some time to warm-up, so when calculating EF you'll want to make sure you exclude that warm-up time.

EF = Average Power (watts)
Average Heart Rate (bpm)

Since EF is dependent on your personal LTHR, comparing your EF with other athletes is of little use. Comparing your own EF from one ride to another, though, is very useful for assessing your aerobic endurance (or generally speaking, fitness). An increase in EF from one ride to another signifies an increase in aerobic endurance. A decrease suggests you have built up significant fatigue and should utilize some recovery. A plateau suggests you have increased your Aerobic Endurance as far as you can with your current training and it may be time for you to move into a Build period.

You will find that your EF for indoor rides will be different from outdoor rides. Typically, due to insufficient body heat management, indoor rides will have lower EF values than outdoor. Additionally, if your indoor rides utilize both rollers and a trainer you will likely find that roller rides have higher EF values than trainer rides. This is because trainers provide constant resistance throughout the pedal stroke while rollers have slightly better "road feel" characteristics.


In the above example, you can see that significant gains in aerobic endurance were achived in the first three weeks. The forth week should have been more of a recovery week to eliminate some of the fatigue that had been built up. By not resting, this example shows a decrease in EF that needed another two weeks to re-gain. With very little change to EF in weeks six through eight, little aerobic endurance was gained during that time and it may have been better to move into the Build period. By monitoring your EF, you can analyze your training to ensure your time is spent wisely.

Decoupling


Another method of determining one's aerobic endurance is by taking a look at Decoupling. When you lack sufficient aerobic endurance, on longer AE rides with steady power output your heart rate will increase over time. Or alternatively, with a steady heart rate your power output will decrease over time. This is referred to as being decoupled, meaning your heart rate is not tracking with your power output. Below are examples of a decoupled ride and a coupled ride.


You can see how the heart rate in the Decoupled ride on the left steadily increases over time even though the power output is held constant. This indicates low aerobic endurance, suggesting additional Base period training in heart rate zone 2 will be beneficial. The Coupled ride on the right indicates good aerobic endurance.

Speed-based Efficiency Factor


If you do not have a power meter, get one. For $700, Stages Cycling has Shimano, SRAM, and FSA offerings. Go order one from Chris at ProBike and tell him Buzz sent you. He'll give you a great deal and reward me with a free valve stem cap for the referral.

If you still don't want to buy a power meter, you can employ an alternative equation for EF to use for your aerobic endurance training. Instead of average power, you can look at asverage speed (and then multiply by 10).

EF = Average Speed (mph)  * 10
Average Heart Rate (bpm)

In order to use this method, though, you will need to ensure the following:
  • Identical route each time with no stops
  • Identical hand position (e.g. on the hoods)
  • No wind
  • No drafting

Keep in mind that there are still factors that will affect speed-based EF like temperature, tire pressure, position on the bike, clothing, weight, etc. For accurate values you want everything to be as identical as possible. It is almost not worth the trouble and there are so many benefits to training with a power meter I hate to suggest this as an alternative. Seriously, just cancel your cable for six months and go buy a power meter.

A Quick Review

  1. The Base period is mainly about increasing your Aerobic Endurance (AE).
  2. A generic AE training ride consists of 1-2 hours of steady riding in heart rate zone 2.
  3. Determine your personal heart rate zone 2 via the 30-minute LTHR test.
  4. Calculate EF for each AE ride to get a feel for your aerobic endurance.
  5. If you don't have a power meter, get one.

New Bike Build: Part 4

Wednesday, February 19, 2014

Bike Build Part 1 Bike Build Part 2 Bike Build Part 3 Bike Build Part 4

Rufus Wright, yes... his name was Rufus

Apologies for the delay since the last bike build post. When I wasn't able to spend time on the bike I opted instead to write about all things bike-related. Now that the docs have cleared me to ride the trainer, all I want to do is ride -- and so the writing has been back-burnered.


Before we get started, a quick side story about the wrench photo above. In 1891, Rufus Wright and his son-in-law, Fred Morgan, started Morgan & Wright, a bicycle tire manufacturing company in Chicago. They also produced other bike components and accessories (like the wrench above). The company was very successful, later moving to Detroit in 1906 and bought by U.S. Rubber Co. in 1911, where their manufacturing techniques were utilized in the manufacturing of tires for automobiles. Rufus was a millionaire but lived modestly and was loved by his ~2,000 employees. Rufus married Helen Allen and they had two daughters. A brilliant inventor and craftsman, Rufus was also an accomplished artist. He spent a lot of time volunteering to educate poor boys in Chicago. He is noted for saying, "I never had any ambition for property beyond a comfortable recompense for my services and what I have I want to spend for the welfare of others."

Painting by Rufus (sold for $1,625)

In 1900, at the age of 67, Rufus was shot in the neck by a woman named Louisa. She was drunk and had asked Rufus to come over. They were talking when Louisa mentioned that she had a gun. He asked her to give it to him and after some convincing finally showed it to him. She refused, however, to hand it over and he struggled to take it from her. During the scuffle he was shot.

Louisa's words: "He fell back on the sofa and gasped that he was shot. I laughed hysterically and told him he was alright. He insisted that he had been wounded and begged me to call a doctor. I told him he was dreaming... I saw at a glance that the revolver had done deadly work, but I could not bring myself to tell anyone of the occurrence. I waited on Mr. Wright for about two hours before I summoned a doctor."

(green text to indicate drunken, slurred speech)

When help arrived, Rufus insisted that it was not Louisa's fault, but the police thought otherwise. He died shortly after from the wound. Sceptics suppose that Louisa had some mental troubles, was very drunk, and had told Rufus that she was going to kill herself. Rufus went to see her in an attempt to save her life – and in the process lost his. Even in his death his desire was to help Louisa, insisting that she not be charged with murder. In his eulogy, Rev. J.V. Blake said of Rufus, "Chicago has lost a mighty friend of charity in his death."

Rufus' headstone in Akron, Ohio

So why do I care? Well, he made a cool looking wrench, had a funny name, a mysterious death, and my great-great-great-grandfather's brother, George Wright, spent some time in Chicago in the late 1800s -- so there is a chance (albeit a small one) that I'm related to Rufus.

Anyway, enough somewhat-accurate, minimally-relevant, semi-interesting history. Back to the build.

When I was a kid, I loved taking things apart to see how they worked. Often, my curiosity resulted in my parent's disapproval, like the time I completely disassembled my sister's brand new home stereo, just two days after my father had purchased it for her birthday. I can still remember how angry he was when he discovered me in her room surrounded by screws, plastic covers, resistors, capacitors, wiring, etc. -- a screwdriver in my hand and a grin on my face. "It's alright dad, I'm going to put it back together." Somehow, he knew that when I finished there would be pieces left over... and the stereo would never work again.

Oops.

But I learned a lot from my youthful confidence, and the countless mistakes it resulted in. I have little doubt that the success I've had as a mechanical engineer could be attributed at least somewhat to the curiosity that drove my parents crazy for years. Problem solving techniques, out-of-the-box thinking, and the willingness to simply try something different have been huge in my professional development.

I have very limited experience with building a bike. But as I did so many years ago looking intently at my sister's stereo scratching my head with some needle-nose pliers, I'll give it a shot and see what happens...

Seatmast Clamp / Saddle / Di2 Battery


The Noah frameset employs the integrated seatmast and comes with the necessary clamp. The clamp fits snuggly to the seatmast and has a single hex key bolt to secure it. The saddle is held in place by a single hex bolt, accessible from the top. There are three saddle clamp positions for the hex bolt and a notched-hole for the Di2 wire that attaches to the battery.

Seatmast clamp shown by professional hand model

I was not a fan of the hex bolt. With the saddle installed, it was difficult to tighten the bolt and I didn't like the appearance of it. Plus, my multi-tool doesn't (and to my knowledge, no cycling-specific multi-tools do) have a wrench in it for that kind of bolt. I decided to trade it out for a knurled stainless steel hex key bolt, which makes installation much easier and has (in my opinion) a "cleaner" appearance. And if I need to adjust the saddle during a ride, I can use the multi-tool.

Replaced bolt shown by professional finger model / new bolt installed

The Di2 battery mounts to the seatmast clamp behind the seat tube under the saddle. An unfortunate issue is that whenever the battery needs to be removed for charging, the saddle is sort of in the way -- I won't have to loosen the saddle to get the battery out, but it is a tight fit. The battery charge is reported to last 600 to 1,500 miles (depending on how often you change gears), so it isn't a huge deal.

Di2 battery connector mounted to seatmast clamp / saddle and battery installed

Most Di2 batteries are installed below the bottle cage on the down tube, but the Noah places Shimano batteries behind the saddle and Campagnolo batteries on the down tube. The aerodynamics are theoretically better with it behind the saddle, and there's less chance of water / dirt / grime damaging it -- but I'm not sure I like the look of it up there and though I don't use one, it eliminates the ability to use a seat bag. I may end up swapping it out for an internal battery installed inside the seatmast.

Guidelines on the SLR saddle rails make adjustments easy

Using a hex key through the slot in the Flow saddle, installing, adjusting, and tightening were quick and easy. When the build is complete, I will adjust the saddle, stem, and handlebar positions to reflect my bike-fit measurements. At that time I will cut the seatmast for the necessary saddle height, hopefully remembering to measure a few times before grabbing the hacksaw.

Headset / Steerer Tube / Stem


The Noah comes with an FSA integrated headset with a nice shallow top cap about one-third the height of the monster that Specialized uses on the Allez. The Noah's head tube is 30 mm shorter than the Allez, but still a tad tall for my taste at 175 mm, so a shallow top cap helps with getting the bars nice and low.

I greased the necessary parts of the headset (the bottom race, top race, bottom bearing, top bearing, and the bottom and top surfaces of the head tube). The bottom race is already pressed on the steerer tube by Ridley. The lower bearing is installed angled-side-up on the steerer tube, and slid down to mate with the lower race, then inserted into the head tube. The top bearing is installed angled-side-down, slid down the steerer tube to the top of the head tube. The upper race slides down the steerer tube to mate with the top bearing. Then the top cap (with internal O-ring) slides down to cover up the top bearing. It's a very quick and easy installation -- the hardest part is probably remembering which way the angled bearings face -- and making sure none of that "gross green junk" (wifey's words) gets on the couch.

Bottom bearing on steerer tube sliding into head tube / top bearing and race

I stole the 3T ARX Pro 110 mm, 17-degree stem from the demolished Allez and decided to try it out on the Noah to see if the length would work before buying a new stem. The Allez had a reach (horizontal distance from bottom bracket to top of head tube) of 397 mm and the Noah has a reach of 390 mm. So it may end up that I need a 120 mm stem to align with my previous bike fit, but with the stack (vertical distance from bottom bracket to top of head tube) and head tube both being shorter on the Noah, the 110 mm stem may just work out perfectly. With the Noah's head tube angle being 73.5 degrees, the 17-degree stem (flipped) makes the stem just about parallel to the ground. If I keep it, for aesthetics I'll probably use some acetone and a rag on the stem to remove the 3T logos (and maybe the stripe too).

With the back injury and unknown flexibility I fought the urge to slam the stem and cut the steerer tube accordingly. I added a 7 mm spacer on top of the headset and then another 5 mm spacer on top of the stem, giving me 12 mm of available "comfort adjustment" in case I find it's needed. If my post-recovery flexibility can handle the slammed stem I will remove the spacers and re-cut the steerer tube.

Headset installed with shallow top cap / spacers and stem setup

With the headset, spacers, and stem installed I marked the steerer tube with a paint pen and then disassembled it all so I could make the cut. I removed the top spacer to mark the cut line because I want the steerer tube to be slightly (2-3 mm) lower than the spacer to correctly install the headset preload expander. I used a hacksaw guide made by Park Tool, and a blade specific for cutting carbon fiber.

Steerer tube cut line just above stem / hacksaw cutting guide

The cutting guide clamps into a vice to hold the steerer tube steady while you cut. A standard hacksaw blade will work provided it has small teeth and is sharp. You want the cut to be straight and smooth, and remember not to inhale the carbon fiber dust (I think it kills you). Once cut, you can use a file or sandpaper to make the end nice and smooth.

Cutting the steerer tube / don't inhale the dust

After cutting it, I used the little trick of writing my info on the hidden portion of the steerer tube. It doesn't prevent theft, but it can help prove ownership if the bike is recovered. Taking pictures of everything is important too, including (especially) the serial number. Photo documentary, receipts, and a detailed list of bike components greatly assists with insurance claims too. I have a template you can download in my Insurance for Cyclists post.

Owner info / steerer tube cut 2-3 mm below the spacer

You can see how the steerer tube is 2-3 mm lower than the spacer to allow proper installation of the preload expander. The insert preloads the headset by expanding when you tighten the hex key bolt. It comes with an optional sleeve if you need it. I like the expander that came with the Noah -- the one from Specialized was finicky.

Headset preload expander with optional sleeve / installing expander

I tightened the preload expander until there was no play in the headset and then tightened the bolts for the stem (using a 5 N·m torque wrench). You want the headset to be snug but not over-tightened as it will affect steering and bearing wear. If the headset is too loose you can damage the bearings. Once the build is complete I will loosen the stem and expander and re-tighten it all again to make sure it is properly preloaded.

Adjusting the headset preload / tightening the stem bolts

Handlebars / Shifters


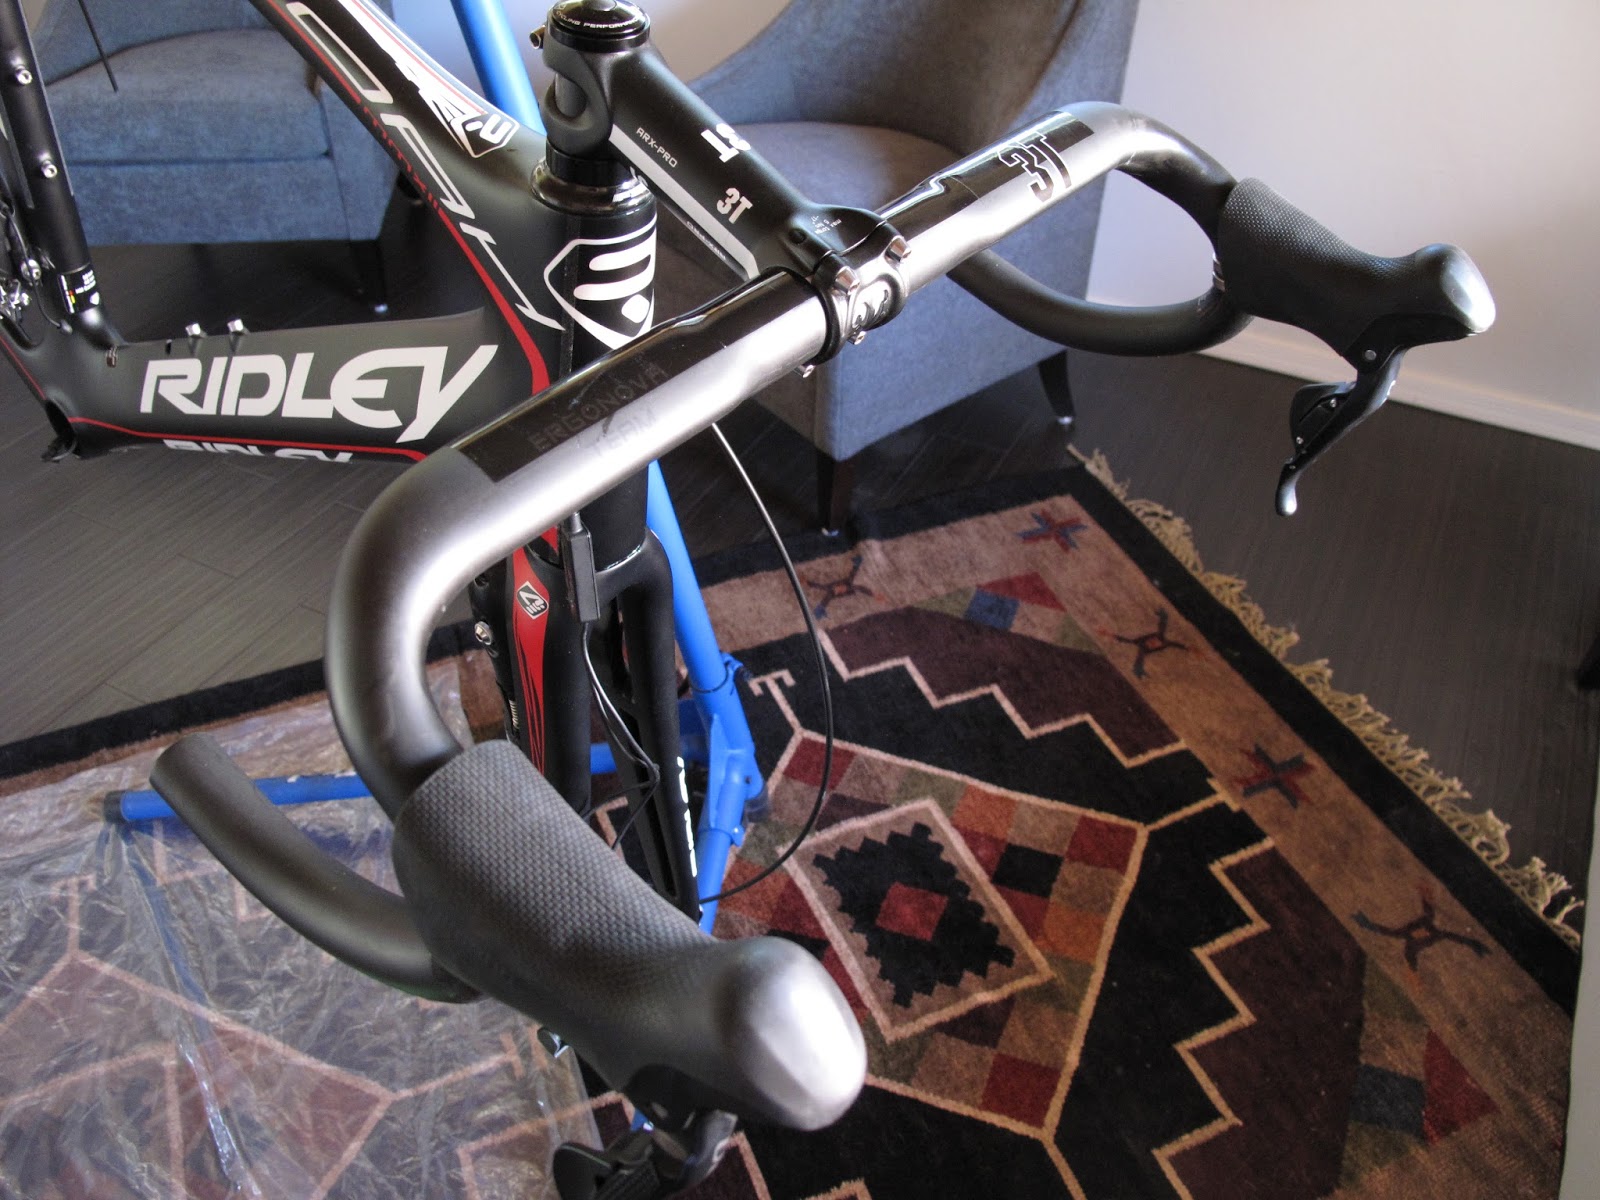
The 3T Ergonova Team Stealth handlebars were a take-off from a bike-shop build and offered to me at a great price. The weight savings of going with these carbon fiber bars is about 67 g, and carbon fiber should help with some vibration dampening. The Ergonova bars employ an "egg-shaped" top meant to provide more comfort (to be determined) and I suppose a little aerodynamic benefit. These bars have a 6-degree flare-out in the drops, making sizing a little different from other bars I've used (44 cm center-to-center is 42 cm at the hoods). The drop of these bars is 123 mm and the reach is 77 mm, both very close to what I am used to.

Installing the handlebars / installing the shifters

Installing the bars is easy. The handlebars have guidelines printed on them to assist with centering, then you rotate them for proper alignment and tighten the four hex key bolts (evenly) to 5 N·m. The flat top is noticeably large, which makes the bars look "heavy" to me -- but I'll try them out and see what I think. I don't ride on the tops much so the comfort of the egg-shape is not really important. I do, however, like the narrower hood location and the flare-out in the drops. And I'll have to do some riding before I can decide if I like the specific ergonomic curvature of these bars (I expect to like it).

Adjusting the height of the shifters / bars and shifters installed

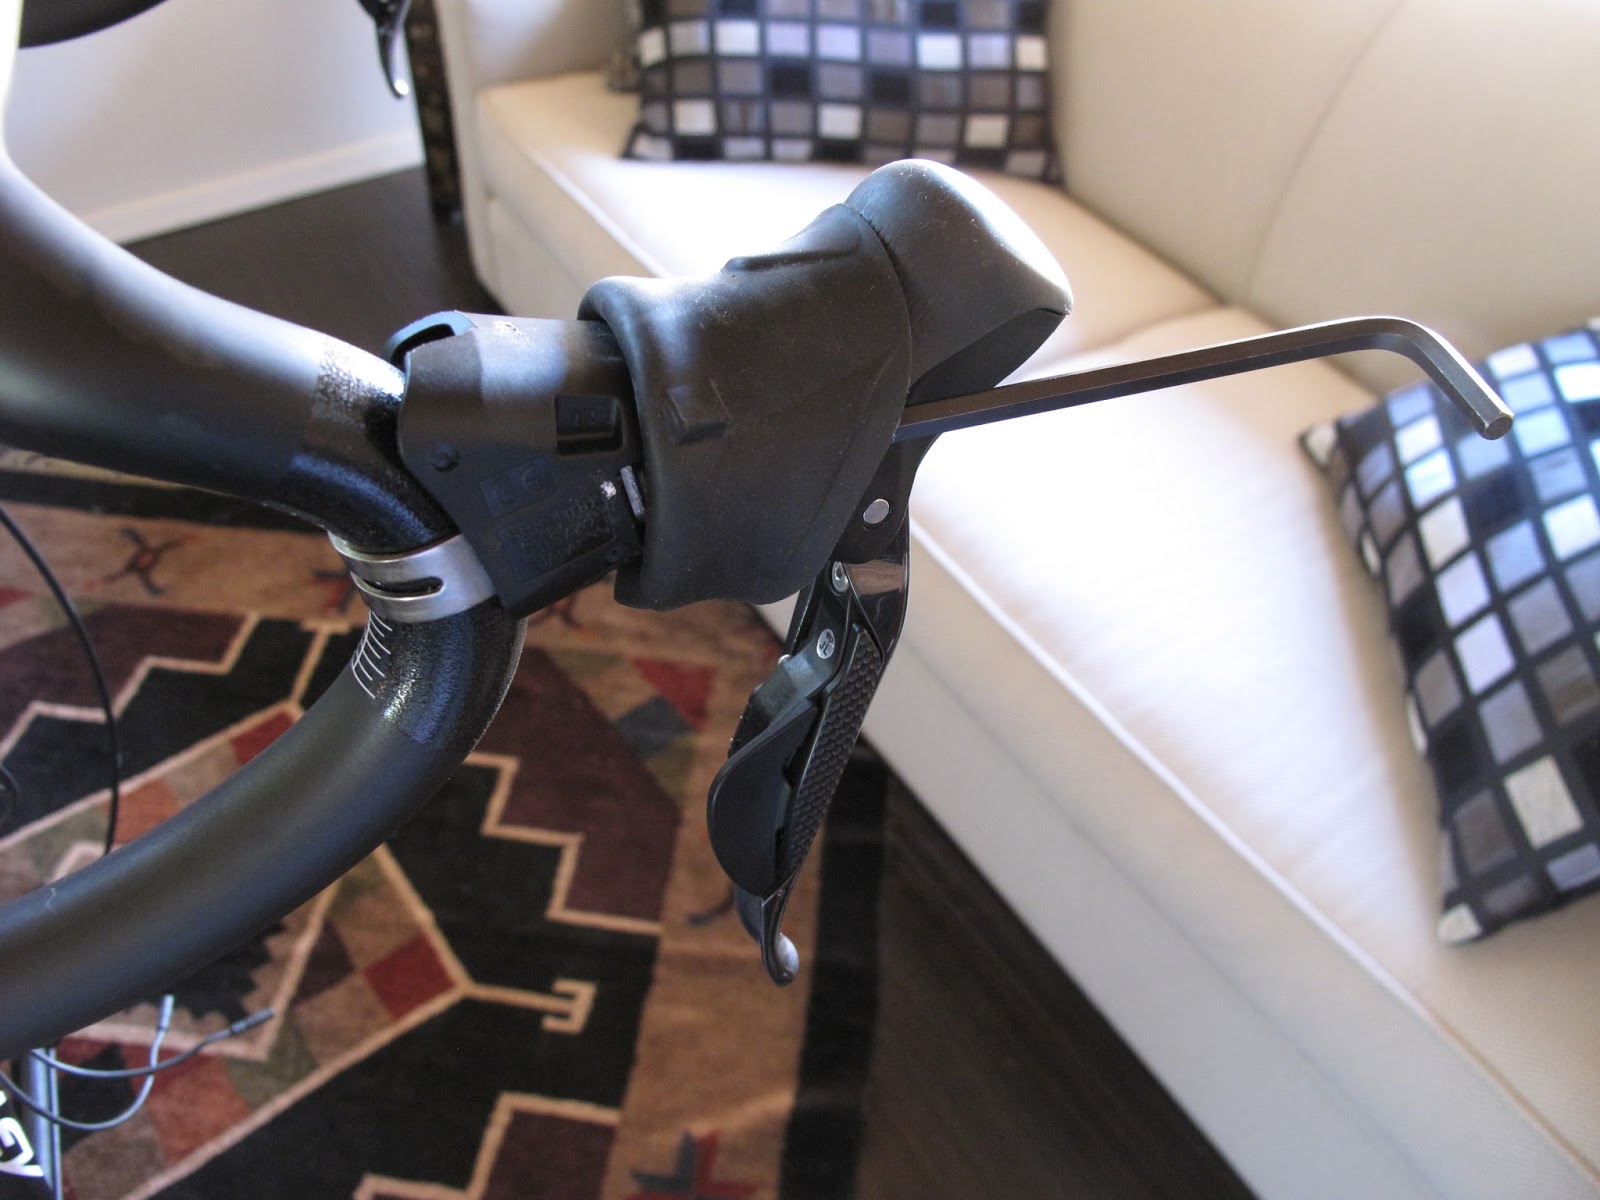
The Ultegra 6700 Di2 shifters feel very similar to the Dura Ace 7800 shifters I had on the Allez. I prefer the feel of these Shimano hoods over the Campagnolo and SRAM ones. The shifters install on the bars by loosening the clamp using a hex key and sliding them up to the appropriate position on the bars. Again, there are guidelines printed so you can install both left and right at the same height. Hood location can be based on feel -- I like a smooth, flat transition from bars to hoods. When doing long hard efforts solo and trying to be "aero" I alternate between IAB (invisible aero bars) and the Sphinx position (which to me is more comfortable with a smooth transition from bars to hoods). Of course when setting up bars one must also take into consideration Rule #46.

Side profile showing bar rotation and shifter location

In Part 5 (which will hopefully be posted before 2015) I'll be installing the brake cables, Di2 wiring, derailleurs, bottom bracket, crankset, and chain.

Bike Build Part 1 Bike Build Part 2 Bike Build Part 3 Bike Build Part 4